Sunday 29 July 2012

Polka dots and bows

I bought this really cute fabric not that long ago that I have been wanting to make into a dress.  I fell in love with the polka dots and the bows.  It's so cute!

I made this dress by making my own pattern.  I traced an existing dress that I had in my closet that I liked the shape of.

(Although I used the same pattern pieces for lining and main fabrics, I made the sheer fabric about 3 inches longer so that it would be slightly longer than the lining.)

Since this has an elastic waistband I thought it would be perfect for this material because it doesn't have much stretch (and the lining has even less).  This style was a little easier to work with because I didn't need to make it an exact fit.

The dress I traced didn't have a lining because the material wasn't sheer.  I added a lining to mine because it was.

I did things a little different than would normally be done, but I liked how simple it made to finish the arm holes and neckline.

I cut out the two lining pieces and the two main pieces.

Next, I hemmed the lining.

I then placed the lining piece (right side up) and the lining piece (hemmed edge down) and sewed around the whole thing EXCEPT for the bottom.

I turned the pieces right side out.  This created a nice edge with no frays.

I did this for both the front and back pieces.  I then sewed the shoulders together.

I finished the arm wholes and neckline by doing topstitching all the way around.

Then I placed the right sides together, sewed up the sides and hemmed the sheer fabric.

For the elastic waist band I sewed some wide bias tape on the inside of the dress through both layers of fabric and then added the elastic cord through and tied it together.


The best part was.... it worked!!

(I'm always shocked when it does!  It's SO exciting)

I will definitely be using this pattern again.  A very simple dress pattern that could be changed so easily.

I wore it out for dinner the next night with some strappy sandals and a long necklace.


Happy sewing!
~Becca

Don't forget to follow me on Pinterest:)

Thursday 26 July 2012

It's what's on the inside that counts......

And what's on the inside of this bag is COLOUR!!

Deceiving from the outside.

I thought I'd make a quick little post about one of the bags I made.  This is one that I made for the craft sale back in June, but nobody purchased it, so I figured I'd post about it here.

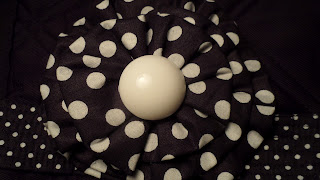
It's the bag that's classy on the front (polka dots.... black and white) and then when you open it..... an ExPLoSiON of colour (and another dose of polka dots).

I love it, and I think I'm going to try out another craft sale.  Maybe someone will fall in love with it:)

It's a magnetic closure with 2 pockets.  It's large enough to carry around a book, your wallet, a bottle of water and more.  I machine quilted it and made the handles! It's very similar to this purse.

Here it is:


Cute as a button!

The exciting inside :)

Happy crafting!
~Becca

Watermelon Coasters

I bought the felt colours for this project a little while ago and they have just been sitting there in my cluttered crafting corner.  FINALLY I organized the corner and it's once again an inspiring space to craft in :)

ALSO since its only 5 months until Christmas, I thought that this would be a great idea to share (hello gift idea!).  Who doesn't love coasters?? (Okay, so maybe everyone doesn't LOVE them.. but I do).

The coasters can be put together to use as a pot holder :)


The inspiration:


The final product:
The front.

The back.


A watermelon slice coaster!! :)

How I went about making them:

I made a template for my watermelon coasters by first drawing a circle and then folding it in half, and then in half again.  I made a slightly smaller version of this, and I also used the edge to made the sliver piece for the front.  I made sure to make the pieces the right size so that there would be a tiny piece of white felt showing through between the pink and the green.

The felt selection.

I cut 1 inch strips of dark green felt and 1/2 inch strips of light green felt.  I  put them together and then used fusible webbing (the kind for applique) to iron them together.

I cut out my shapes.

Here are all of the pieces: 4 large stripe wedges, 4 large white wedges, 4 small pink wedges and 4 striped  slivers.

Ironed the slivers to the white piece.
********put a piece of paper between the iron and the felt, and  keep the iron moving or you will have  a  melted piece of felt on the bottom of your iron.... I speak from experience.

Sew the pink felt to the white piece, and then iron the big striped wedge to the pink/striped/white wedge.  *** again, use the paper***

I sewed around the sliver and then I made a small stitch at the corner of the wedge just to make sure the back and front  stay together (this stitch will be covered by a seed).

I used black and white polka dotted cotton to make the seeds.  I just ironed on some fusible webbing and cut out my seed shapes.  I then ironed them on (with paper in between!!!)

TA DA :)


I think these coasters are great for the summer, and look good enough to eat!  They were fun to make and they give me other coaster ideas in this shape.... like pizza, oranges and lemons!

Can't wait to test them out on a cool summer drink!


Happy Sewing!!
~Becca

Monday 16 July 2012

From Frumpy to Fab! (How I made a cute summer dress)

So I finally have gotten around to refashioning one of the many dresses in my "frumpy dress" pile.  It is SO exciting to go to the thrift store and find a frumpy old dress or skirt that you can see has so much potential.  You have to look past the shape, and past the shoulder pads to see the potential...... but it's there.

I even got a discount on this dress because there was a big rip in the side seam!  (ALWAYS ask for a discount if something is ripped...... even at a thrift store... sometimes you can get lucky!)

After trying this dress on, I realized that I wanted to leave the original elastic waist band.  I just wear it a little higher in my revamped version.

I would love to say I'm going to lay out step by step how I made this, and give you measurements, but unfortunately, that's not going to happen.  Since I didn't use a pattern, I cut and sewed and tried on as I went.  I used the extra fabric from the bottom that I cut off to shorten the dress, for the straps, and I used one of the sleeves to make the top ruffle.  I even used the two cute little buttons from the sleeves!

I'm REALLY happy with how this turned out, and I can't wait to dive back into the pile of dresses!


Here it is!!

I cut out the sleeves

Figuring out how to add the ruffle
All done!
Close up of the ruffle

As cute as a button
VERY pleased at how it turned out!


Happy refashioning!!
~Becca